
CImage and img.php for image resize, crop and processing using PHP GD
New website for CImage and img.php
Update 2016-06-27.
Go to cimage.se/doc to read the latest version of documentation on Cimage and img.php.
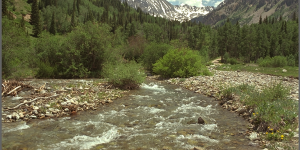
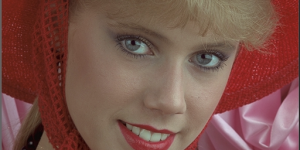
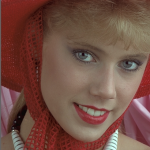
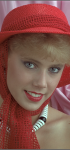
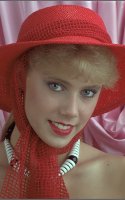
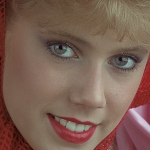
.](https://dbwebb.se/cimage/imgd.php?src=cimage/kodim07.png&w=200&c=140,140,520,340&sharpen)
Cropping a part of a larger image.
CImage is a PHP class enabling resizing of images through scaling, cropping and filtering effects – using PHP GD. The script img.php uses CImage to enable server-side image processing utilizing caching and optimization of the processed images.
Server-side image processing is a most useful tool for any web developer, img.php has an easy to use interface and its powerful when you integrate it with your website. Using it might decrease the time and effort for managing images and it might improve your workflow for creating content for websites.
This software is free and open source, licensed according MIT.
#Requirements
CImage and img.php supports GIF (with transparency), JPEG and PNG (8bit transparent, 24bit semi transparent) images. It requires PHP 5.3 and PHP GD. You optionally need the EXIF extension to support auto-rotation of JPEG-images.
Version v0.7.x will be the last version to support PHP 5.3. Coming version will require newer version of PHP.
#Installation
There are several ways of installing. You either install the whole project which uses the autoloader to include the various files, or you install the all-included bundle that – for convenience – contains all code in one script.
#Install source from GitHub
The sourcode is available on GitHub. Clone, fork or download as zip.
Latest stable version is v0.7.1 released 2015-07-25.
I prefer cloning like this. Do switch to the latest stable version.
git clone git://github.com/mosbth/cimage.git
cd cimage
git checkout v0.7.1
Make the cache-directory writable by the webserver.
chmod 777 cache
#Install all-included bundle
There are some all-included bundles of img.php that can be downloaded and used without dependency to the rest of the sourcecode.
| Scriptname | Description |
|---|---|
imgd.php |
Development mode with verbose error reporting and option &verbose enabled. |
imgp.php |
Production mode logs all errors to file, giving server error 500 for bad usage, option &verbose disabled. |
imgs.php |
Strict mode logs few errors to file, giving server error 500 for bad usage, option &verbose disabled. |
Dowload the version of your choice like this.
wget https://github.com/mosbth/cimage/tree/v0.7.1/webroot/imgp.php
Open up the file in your editor and edit the array $config. Ensure that the paths to the image directory and the cache directory matches your environment, or create your own config-file for the script.
#Install from Packagist
You can install the package mos/cimage from Packagist using composer.
#Use cases
Lets take some use cases to let you know when and how img.php might be useful.
#Make a thumbnail

A thumbnail of 80x80 pixels.
Lets say you have a larger image and you want to make a smaller thumbnail of it with a size of 80x80 pixels. You simply take the image and add constraints on width, height and you use the resize strategy crop-to-fit to crops out the parts of the image that does not fit.
To produce such a thumbnail, create a link like this:
img.php?src=kodim04.png&width=80&height=80&crop-to-fit
#Slightly complexer use case
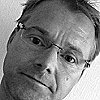
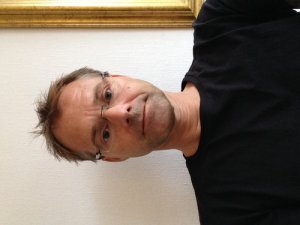
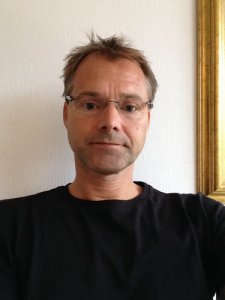
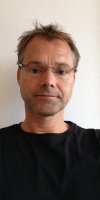
Perhaps you got an image from a friend. The image was taken with the iPhone and thus rotated.

Me from the iPhone.
The original image is looking like this one, scaled down to a width of 250 pixels.
So, you need to rotate it and crop off some parts to make it intresting.
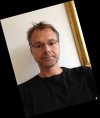
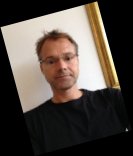
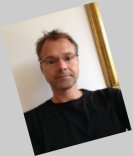
To show it off, I’ll auto-rotate the image based on its EXIF-information, I will crop it to a thumbnail of 100x100 pixels and add a filter to make it greyscale finishing up with a sharpen effect. Just for the show I’ll rotate the image 25 degrees - do not ask me why.
Lets call this the URL-Photoshopper. This is how the magic looks like.
img.php?src=issue36/me-270.jpg&w=100&h=100&cf&aro&rb=-25&a=8,30,30,38&f=grayscale&convolve=sharpen-alt
Me as a thumbnail.
For myself, I use img.php to put up all images on my website, it gives me the power of affecting the resulting images - without opening up a photo-editing application.
#Get going quickly
#Check out the test page
Try it out by pointing your browser to the test file webroot/test/test.php. It will show some example images and you can review how they are created.
#Process your first image

Try it yourself by opening up an image in your browser. Start with
webroot/img.php?src=kodim04.png
and try to resize it to a thumbnail by adding the options
&width=100&height=100&crop-to-fit
#What does “processing the image” involves?
Add &verbose to the link to get a verbose output of what is happens during image processing. This is useful for developers and those who seek a deeper understanding on how it works behind the scene.
#Check your system
Open up webroot/check_system.php if you are uncertain that your system has the right extensions loaded.
#How does it work?
Review the settings in webroot/img_config.php and check out webroot/img.php on how it uses CImage.
The programatic flow, just to get you oriented in the environment, is.
- Start in
img.php. img.phpreads configuration details fromimg_config.php(if the config-file is available).img.phpreads and processes incoming$_GETarguments to prepare usingCImage.img.phpusesCImage.CImageprocesses, caches and outputs the image according to how its used.
Read on to learn more on how to use img.php.
#Basic usage
#Select the source
Open an image through img.php by using its src attribute.
img.php?src=kodim13.png
It looks like this.
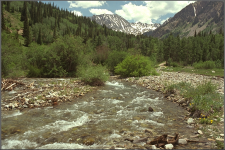
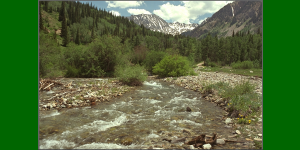
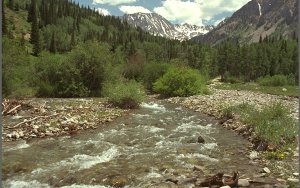
, from The Kodak Colorset.](https://dbwebb.se/cimage/imgd.php?src=cimage/kodim13.png&w=w1&save-as=jpg)
A river, kodimg13.png, from The Kodak Colorset.
All images are stored in a directory structure and you access them as:
?src=dir1/dir2/image.png
#Resize using constraints on width and height
Create a thumbnail of the image by applying constraints on width and height, or one of them.
&width=150 |
&height=150 |
&w=150&h=150 |
|---|---|---|
 |
 |
 |
By setting width, height or both, the image gets resized to be not larger than the defined dimensions and keeping its original aspect ratio.
Think of the constraints as a imaginary box where the image should fit. With width=150 and height=150 the box would have the dimension of 150x150px. A landscape image would fit in that box and its width would be 150px and its height depending on the aspect ratio, but for sure less than 150px. A portrait image would fit with a height of 150px and the width depending on the aspect ratio, but surely less than 150px.
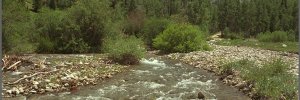
#Resize to fit a certain dimension
Creating a thumbnail with a certain dimension of width and height, usually involves stretching or cropping the image to fit in the selected dimensions. Here is how you create a image that has the exact dimensions of 300x150 pixels, by either stretching, cropping or fill to fit.
| What | The image |
|---|---|
Original. The original image resized with a max width and max height.?w=300&h=150 |
 |
Stretch. Stretch the image so that the resulting image has the defined width and height.?w=300&h=150&stretch |
 |
Crop to fit. Keep the aspect ratio and crop out the parts of the image that does not fit.?w=300&h=150&crop-to-fit |
 |
Fill to fit. Keep the aspect ratio and fill then blank space with a background color.?w=300&h=150&fill-to-fit=006600 |
 |
Learn to crop your images, creative cropping can make wonderful images from appearingly useless originals.
Stretching might work, like in the above example where you can not really notice that the image is stretched. But usually, stretching is not that a good option since it distorts the ratio. Stretching a face may not turn out particularly well.
Fill to fit is useful when you have some image that must fit in a certain dimension and stretching nor cropping can do it. Carefully choose the background color to make a good resulting image. Choose the same background color as your website and no one will notice.
#List of parameters
img.php supports a lot of parameters. Combine the parameters to get the desired behavior and resulting image. For example, take the original image, resize it using width, aspect-ratio and crop-to-fit, apply a sharpen effect, save the image as JPEG using quality 30.
img.php?src=kodim13.png&w=600&aspect-ratio=4&crop-to-fit&sharpen&save-as=jpg&q=30
Here is a list of all parameters that you can use together with img.php, grouped by its basic intent of usage.
#Mandatory options and debugging
Option src is the only mandatory option. The options in this section is useful for debugging or deciding what version of the target image is used.
| Parameter | Explained |
|---|---|
src |
Source image to use, mandatory. src=img.png or with subdirectory src=dir/img.png. |
nc, no-cache |
Do not use the cached version, do all image processing and save a new image to cache. |
so, skip-original |
Skip using the original image, always process image, create and use a cached version of the original image. |
v, verbose |
Do verbose output and print out a log what happens. Good for debugging, analyzing the process and inspecting how the image is being processed. |
json |
Output a JSON-representation of the image, useful for testing or optimizing when one wants to know the image dimensions, before using it. |
pwd, password |
Use password to protect unauthorized usage. |
#Options for deciding width and height of target image
These options are all affecting the final dimensions, width and height, of the resulting image.
| Parameter | Explained |
|---|---|
h, height |
h=200 sets the width to be to max 200px. h=25% sets the height to max 25% of its original height. |
w, width |
w=200 sets the height to be max 200px. w=100% sets the width to max 100% of its original width. |
ar, aspect-ratio |
Control target aspect ratio. Use together with either height or width or alone to base calculations on original image dimensions. This setting is used to calculate the resulting dimension for the image. w=160&aspect-ratio=1.6 results in a height of 100px. Use ar=!1.6 to inverse the ratio, useful for portrait images, compared to landscape images. |
dpr, device-pixel-ratio |
Default value is 1, set to 2 when you are delivering the image to a high density screen, dpr=2 or dpr=1.4. Its a easy way to say the image should have larger dimensions. The resulting image will be twice as large (or 1.4 times), keeping its aspect ratio. |
#Options for resize strategy
These options affect strategy to use when resizing an image into a target image that has both width and height set.
| Parameter | Explained |
|---|---|
nr, no-ratio, stretch |
Do not keep aspect ratio when resizing and using both width & height constraints. Results in stretching the image, if needed, to fit in the resulting box. |
cf, crop-to-fit |
Set together with both h and w to make the image fit into dimensions, and crop out the rest of the image. |
ff, fill-to-fit |
Set together with both h and w to make the image fit into dimensions, and fill the rest using a background color. You can optionally supply a background color as this ff=00ff00, or ff=00ff007f when using the alpha channel. |
nu, no-upscale |
Avoid smaller images from being upscaled to larger ones. Combine with stretch, crop-to-fit or fill-to-fit to get the smaller image centered on a larger canvas. The requested dimension for the target image are thereby met. |
#Options for cropping part of image
These options enable to decide what part of image to crop out.
| Parameter | Explained |
|---|---|
c, crop |
Crops an area from the original image, set width, height, start_x and start_y to define the area to crop, for example crop=100,100,10,10 (crop=width,height,start_x,start_y). Left top corner is 0, 0. You can use left, right or center when setting start_x. You may use top, bottom or center when setting start_y. |
a, area |
Define the area of the image to work with. Set area=10,10,10,10 (top, right, bottom, left) to crop out the 10% of the outermost area. It works like an offset to define the part of the image you want to process. Its an alternative of using crop. |
#General processing options
These options are general options affecting processing.
| Parameter | Explained |
|---|---|
bgc, bg-color |
Set the backgroundcolor to use (if its needed). Use six hex digits as bgc=00ff00 and 8 digits when using the alpha channel, as this bgc=00ff007f. The alpha value can be between 00 and 7f. |
#Processing of image before resizing
This option are executed before the image is resized.
| Parameter | Explained |
|---|---|
s, scale |
Scale the image to a size proportional to a percentage of its original size, scale=25 makes an image 25% of its original size and size=200 doubles up the image size. Scale is applied before resizing and has no impact of the target width and height. |
rb, rotate-before |
Rotate the image before its processed, send the angle as parameter rb=45. |
aro, auto-rotate |
Auto rotate the image based on EXIF information (useful when using images from smartphones). |
#Processing of image after resizing
These options are executed after the image is resized.
| Parameter | Explained |
|---|---|
ra, rotate-afterr, rotate |
Rotate the image after its processed, send the angle as parameter ra=45. |
sharpen |
Appy a convolution filter that sharpens the image. |
emboss |
Appy a convolution filter with an emboss effect. |
blur |
Appy a convolution filter with a blur effect. |
convolve |
Appy custom convolution filter as a 3x3 matrix, a divisor and offset, convolve=0,-1,0,-1,5,-1,0,-1,0,1,0 sharpens the image. |
convolve |
Use predefined convolution expression as convolve=sharpen-alt or a serie of convolutions as convolve=draw,mean,motion. These are supported out of the box: lighten, darken, sharpen, sharpen-alt, emboss, emboss-alt, blur, gblur, edge, edge-alt, draw, mean, motion. Add your own, or overwrite existing, in img_config.php. |
f, filter |
Apply filter to image, f=colorize,0,255,0,0 makes image more green. Supports all filters as defined in PHP GD imagefilter(). |
f0, f1-f9 |
Same as filter, just add more filters. Applied in order f, f0-f9. |
sc, shortcut |
Save longer expressions in img_config.php. One place to change your favorite processing options, use as sc=sepia which is a shortcut for &f=grayscale&f0=brightness,-10&f1=contrast,-20&f2=colorize,120,60,0,0&sharpen. |
#Saving image, affecting quality and file size
Options for saving the target image.
| Parameter | Explained |
|---|---|
q, quality |
Quality affects lossy compression and file size for JPEG images by setting the quality between 1-100, default is 60. Quality only affects JPEG. |
co, compress |
For PNG images it defines the compression algorithm, values can be 0-9, default is defined by PHP GD. Compress only affects PNG. |
p, palette |
Create a palette version of the image with up to 256 colors. |
sa, save-as |
Save resulting image as JPEG, PNG or GIF, for example ?src=river.png&save-as=gif. |
alias |
Save resulting image as a copy in the alias-directory. |
Carry on reading to view examples on how to use and combine the parameters to achieve desired effects and target images.
#The configuration settings in _config.php
There are several configurations settings that can be used to change the behaviour of img.php. Here is an overview, listed as they appear in the default config-file.
| Setting | Explained |
|---|---|
mode |
Set to “development”, “production” or “strict” to match the mode of your environment. It mainly affects the error reporting and if option verbose is enabled or not. |
autoloader |
Path to the file containing the autoloader. |
image_path |
Path to the directory-structure containing the images. |
cache_path |
Path to the directory where all the cache-files are stored. |
alias_path |
Path to where the alias, or copy, of the images are stored. |
password |
Set the password to use. |
password_always |
Always require the use of password and match with password. |
remote_allow |
Allow remote download of images when src=http://example.com/img.jpg. |
remote_pattern |
Pattern (regexp) to detect if a file is remote or not. |
valid_filename |
A regular expression to test if a src filename is valid or not. |
valid_aliasname |
A regular expression to test if a alias filename is valid or not. | |
img_path_constraint |
Check that the target image is in a true subdirectory of img-path (disables symbolic linking to another part of the filesystem. |
default_timezone |
Use to set the timezone if its not already set. |
max_width |
Maximal width of the target image. Fails for larger values. |
max_height |
Maximal height of the target image. Fails for larger values. |
background_color |
Specify a default background color and overwrite the one proposed by CImage. |
png_filter |
Use (or not) an external command for filter PNG images. |
png_filter_cmd |
Path and options to the actual external command. |
png_deflate |
Use (or not) an external command for deflating PNG images. |
png_deflate_cmd |
Path and options to the actual external command. |
jpeg_optimize |
Use (or not) an external command for optimizing JPEG images. |
jpeg_optimize_cmd |
Path and options to the actual external command. |
convolution_constant |
Constants for own defined convolution expressions. |
allow_hotlinking |
Allow or disallow hotlinking7leeching of images. |
hotlinking_whitelist |
Array of regular expressions that allow hotlinking (if hotlinking is disabled). |
shortcut |
Define own shortcuts for more advanced combination of options to img.php. |
size_constant |
Create an array with constant values to be used instead of width and height. |
aspect_ratio_constant |
Create an array for constant values to be used with option ‘aspect-ratio`. |
Consult the file webroot/img-config.php for a complete list together with the default values for each configuration setting. There is an appendix where you can see the default config-file.
#Create and name the config file
The file img.php looks for the config-file img_config.php, and uses it if its found. The three files where everything is included – imgd.php, imgp.php and imgs.php – includes an empty $config-array which can be overridden by saving a config-file in the same directory. If the script is imgp.php then name the config-file imgp_config.php and it will find it and use those settings.
#Strategy to use images for web publication
I have a basic strategy when using images for web publication. I start with an original image which, is decent enough to show on its own. It has a image dimension of, lets say as an example, around 1200 x 1200 pixels. It has a good enough quality and a file size that is not to large to make the user annoyed when downloading to display it. This is my original image and all other images are based on this. They are rescaled and filtered, cropped and reduced in file size, and so on. One original image from which all the other images are descendants.
This is the basic strategy that I’m using and this strategy is the driving force behind the requirements for CImage and img.php.
#Scaling and resizing
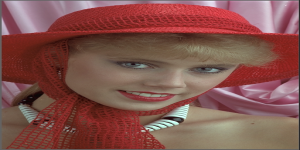
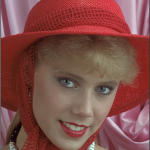
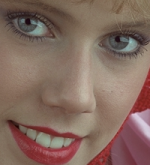
, from The Kodak Colorset.](https://dbwebb.se/cimage/imgd.php?src=cimage/kodim04.png&w=250&save-as=jpg)
A face of a girl, kodimg04.png, from The Kodak Colorset.
You can control the resulting image dimension using width and height. You can use width to only set the width or height to only set the height. The image will keep its aspect ratio and calculate the corresponding width and height.
You can specify both width and height, the resulting image will fit in the imaginary “box” and its width nor its height will be larger than specified.
For example, if you have an image of dimensions 100 x 50 (w x h) and resize it using w=50&h=50, the resulting image will have the dimensions 50 x 25 (w x h). The aspect ratio of the image is preserved and the constraints that the image should not be wider than 50px and not higher than 50px are met.
#Creating an image with an exact size
Sometimes you need the image to fit in its boundaries, for example when creating a banner or a thumbnail. One way to do so is to stretch the image to fit in the imaginary box specified by width and height. You can also choose to crop out the parts that does not fit, or fit the image and fill the remaining parts with a background color. These are all different strategies to use when resizing the image.
Here follows some examples to illustrate the resize strategies.
| What | The image |
|---|---|
Original. The original image resized with a max width and max height.?w=300&h=150 |
 |
Stretch. Stretch the image so that the resulting image has the defined width and height.?w=300&h=150&stretch |
 |
Crop to fit. Keep the aspect ratio and crop the parts of the image that does not fit.?w=300&h=150&crop-to-fit |
 |
Fill to fit. Keep the aspect ratio and fit the whole image in the dimension, fill out the remaining parts with a background color.?w=300&h=150&fill-to-fit=66000 |
 |
As one can see - stretching an image is not always a good solution.
#Define the area of the image to work on
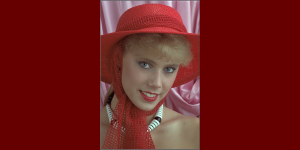
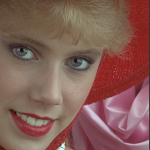
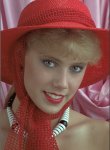
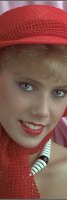
When you crop to fit an image, the base will be the center of the image. You can change this by setting an area as a base for calculating which part to use of the source image. This is actually an easy way of cropping the part of the image that you want to use. You can see this as defining an offset for the active part of the image. You set the area using values for top,right,bottom,left, each value being a percentage of the original image width/height.
Lets take an example where we want to create a thumbnail of the lady, we want to focus on her eyes and mouth.
| What | The image |
|---|---|
Crop to fit without defining the area.?w=150&h=150&crop-to-fit |
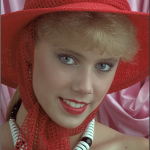 |
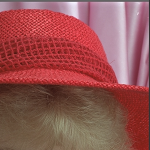
Ignore the top 25% of the image.?w=150&h=150&crop-to-fit&area=25,0,0,0 |
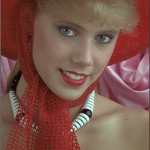 |
Ignore the right 20% of the image.?w=150&h=150&crop-to-fit&area=0,20,0,0 |
 |
Ignore the bottom 20% of the image.?w=150&h=150&crop-to-fit&area=0,0,20,0 |
 |
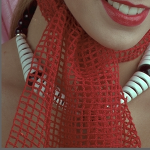
Ignore the left 35% of the image.?w=150&h=150&crop-to-fit&area=0,0,0,35 |
 |
Make it altogether to fit only the eyes and the mouth. It may take some tries to get it right.?w=150&h=150&crop-to-fit&area=25,20,20,35 |
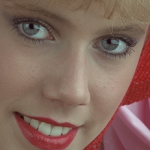 |
#Predefined sizes
There are a set of predefined sizes available in img_config.php. These are based on a grid of 24 columns where each column is 30px wide and a gutter of 10px between each column. The predefined sizes are named c1 to c24 and corresponds to the width of the columns in the grid. It can be useful to specify the image width based on predefined sizes, if you ever want to change the grid, or the size of the main article column or the sidebar column, then you have only one place to change the image size. This might be time saver when working on websites changing their layout.
| What | Parameters | The image |
|---|---|---|
One column, c1, 30px wide. |
?w=c1&h=150&crop-to-fit |
 |
Two columns width, c2, 30px * 2 + 10px = 70px wide. |
?w=c2&h=150&crop-to-fit |
 |
Three columns, c3, 30px * 3 + 10px * 2 = 110px wide. |
?w=c3&h=150&crop-to-fit |
 |
You can specify your own constants and map them to a size. You do this by editing the configuration file.
#Calculate dimensions using aspect ratio
You can use aspect ratio to create images that has a well defined relation between width and height. Specify width, or height, together with aspect ratio and the other dimension will be calculated. If you omit both width and height, but specify aspect ratio, the resulting dimensions is based on the original dimensions.
The resulting dimensions specify a box for the image, which any resulting image dimension will not overflow, you need to use stretch, crop-to-fit or fill-to-fit to make the image fit into the box.
Here are some examples on how to use aspect ratio.
#Aspect ratio on landscape image with width 300px
| Aspect ratio, parameters | The image |
|---|---|
16:9&w=300&crop-to-fit&aspect-ratio=16:10 |
 |
3:1&w=300&crop-to-fit&aspect-ratio=3:1 |
 |
The aspect ratio can be a float, for example &aspect-ratio=1.6 or any of the predefined aspect ratios in img_config.php, as of this writing it includes 3:1, 3:2, 4:3, 8:5, 16:10, 16:9 and golden (for the golden ratio).
The aspect ratio can be inverted by prepending an exclamation mark ! to the value. This can be useful when working with portrait images.
#Inverted aspect ratio on portrait image with height 200px
| What, parameters | The image |
|---|---|
!16:9&h=200&crop-to-fit&aspect-ratio=!16:10 |
 |
!3:1&h=200&crop-to-fit&aspect-ratio=!3:1 |
 |
Aspect ratio can be a good way to make all images the same size, or at least, having the same aspect ratio.
#Scale before processing
If you want the target image to be a percentage of its original size, then use width=50% or height=50%, or both. The parameter scale is however a different story.
The parameter scale is used to scale the original image as a first step in processing the image. Sometimes you can achieve better end result by first scaling up (or down) the original image, before actually resizing the image.
Applying scale=25% will reduce the image before processing. This can produce some nice effects, or none, depending on what happens next.
Use of the scale parameter.
| What | Parameters | The image |
|---|---|---|
| Original | &w=300 |
 |
| Downsize to 10% | &w=300&scale=10 |
 |
| Downsize to 5% | &w=300&scale=5 |
 |
In both cases, the scaling is done as the first step in processing. In all cases the final image will have a width of 300px, so the scale parameter only affects the source image used prior resizing.
#Crop
You can crop parts of an image by setting the width, height, start_x and start_y to define the area to crop from the original image. Doing this, we can achieve the same results as when using area. It is just another mean to the same end, which is – cropping out a certain area of the image. Lets see how this way of cropping works. Lets crop the eyes and the mouth of the lady, once more.
| What | Parameters | The image |
|---|---|---|
| Crop a portion of 300x300 pixels, start at the left, top corner, that is position 0, 0. | ?w=150&crop=300,300,0,0 |
 |
| Crop portion, start at the right, top corner. | ?w=150&crop=300,300,right,top |
 |
| Crop portion, start at the right, bottom corner. | ?w=150&crop=300,300,right,bottom |
 |
| Crop portion, start at the left, bottom corner. | ?w=150&crop=300,300,left,bottom |
 |
| Crop portion, start at the center, center. | ?w=150&crop=300,300,center,center |
 |
| Crop only the eyes and the mouth. | ?w=150&crop=200,220,190,300 |
 |
Cropping is essential when trying to only get the most interesting part of the image.
#Filters
There are a set of custom made filters that can be used to apply filter effects on the image. These are sharpen, emboss and blur. These filters are applied last in the processing chain, after the image has been resized to its final dimensions.
The implementation of these filters are based on a comment in the PHP manual and each filter is discussed in these webpages - basics and blur, sharpen, emboss - all made by Lori J. Davis.
The basis is to apply image processing based on a matrix, also called image convolution 1.
, from The Kodak Colorset.](https://dbwebb.se/cimage/imgd.php?src=cimage/kodim22.png&w=w2&save-as=jpg)
A red barn, kodimg22.png, from The Kodak Colorset.
Sharpening an image enhances its edges and textures and makes it more focused and sharp.
Blurring an image makes it more unfocused, it smooths out the sharp edges.
Embossing makes the image look a little like 3D by adding highlights or shadows to the image.
In general, it seems like a good idea to add a sharpening effect when resizing images to smaller dimensions. Sharpening may remove the blurry edges that is a artifact from scaling down an image and result in an overall better looking image.
| Examples on filtering | |
|---|---|
Original. ?w=300&save-as=jpg 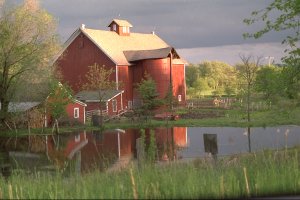 |
Sharpen. ?w=300&save-as=jpg&sharpen 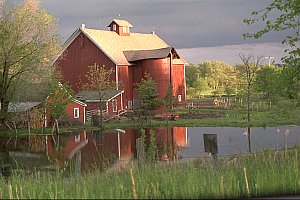 |
Emboss. ?w=300&save-as=jpg&emboss  |
Blur. ?w=300&save-as=jpg&blur  |
These are easy to use filters which quickly can add effects to the image. You can combine all three filters and they are then executed in this order, (1) blur, (2) emboss, (3) sharpen. These are the lasts effects that are applied to the image, just before saving it to disk.
#Custom filter with convolution
The filters above are implemented as convolve-expressions. These are a matrix of 3x3 together with a divisor and an offset. Its just like the PHP-function imageconvolution().
The following convolution expressions are supported by CImage.
/**
 * Custom convolution expressions, matrix 3x3, divisor and offset.
 */
private $convolves = array(
    'lighten'       => '0,0,0, 0,12,0, 0,0,0, 9, 0',
    'darken'        => '0,0,0, 0,6,0, 0,0,0, 9, 0',
    'sharpen'       => '-1,-1,-1, -1,16,-1, -1,-1,-1, 8, 0',
    'sharpen-alt'   => '0,-1,0, -1,5,-1, 0,-1,0, 1, 0',
    'emboss'        => '1,1,-1, 1,3,-1, 1,-1,-1, 3, 0',
    'emboss-alt'    => '-2,-1,0, -1,1,1, 0,1,2, 1, 0',
    'blur'          => '1,1,1, 1,15,1, 1,1,1, 23, 0',
    'gblur'         => '1,2,1, 2,4,2, 1,2,1, 16, 0',
    'edge'          => '-1,-1,-1, -1,8,-1, -1,-1,-1, 9, 0',
    'edge-alt'      => '0,1,0, 1,-4,1, 0,1,0, 1, 0',
    'draw'          => '0,-1,0, -1,5,-1, 0,-1,0, 0, 0',
    'mean'          => '1,1,1, 1,1,1, 1,1,1, 9, 0',
    'motion'        => '1,0,0, 0,1,0, 0,0,1, 3, 0',
);
```

Each expression is an eleven float value string, separated by commas. The string is converted like this.

```php
    // As defined
    'sharpen'  => '-1,-1,-1, -1,16,-1, -1,-1,-1, 8, 0',

    // Converted to ([] is short syntax for array())
    $matrix = [
        [-1, -1, -1],
        [-1, 16, -1],
        [-1, -1, -1],
    ];

    $divisor = 8;
    $offset  = 0;

    // Called by this
    $img = imageconvolution($img, $matrix, $divisor, $offset)
So, above expressions are defined in CImage. But you can define your own in img_config.php and the default config-file contains an example like this. They are outcommented by default since they are only there as an example.
/**
 * Create custom convolution expressions, matrix 3x3, divisor and
 * offset.
 */
'convolution_constant' => array(
    //'sharpen'       => '-1,-1,-1, -1,16,-1, -1,-1,-1, 8, 0',
    //'sharpen-alt'   => '0,-1,0, -1,5,-1, 0,-1,0, 1, 0',
),
The convolution expressions defined in img_config.php will add to, or overwrite, those defined in CImage. Any convolution constant can then be used, no matter where its defined.
Lets see an example on using convolution, based on this image.

A girl in kodim15.png from the Kodak image set.
| Example of convolution | |
|---|---|
Lighten.?w=300&convolve=lighten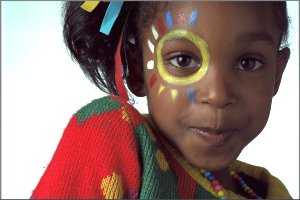 |
Darken.?w=300&convolve=darken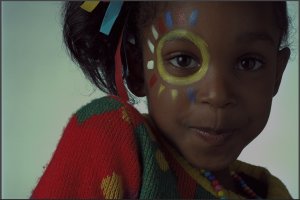 |
Sharpen.?w=300&convolve=sharpen |
Sharpen-alt.?w=300&convolve=sharpen-alt |
Blur.?w=300&convolve=blur |
Gaussian blur.?w=300&convolve=gblur |
Mean.?w=300&convolve=mean |
Motion.?w=300&convolve=motion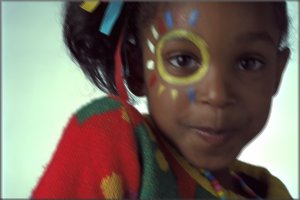 |
Emboss.?w=300&convolve=emboss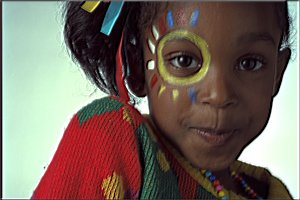 |
Emboss alt.?w=300&convolve=emboss-alt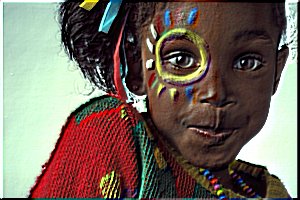 |
Edge.?w=300&convolve=edge |
Edge alt.?w=300&convolve=edge-alt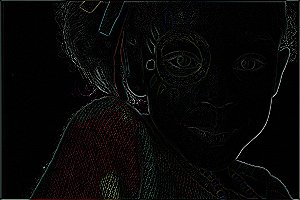 |
Draw.?w=300&convolve=draw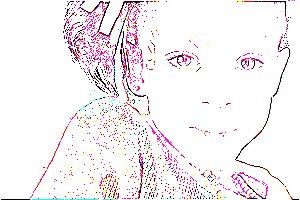 |
Combine several filters.&convolve=draw:edge-alt:emboss-alt:motion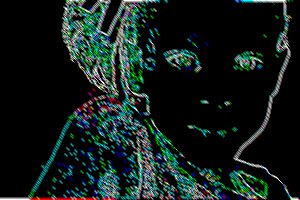 |
If you have some special filter that you use a lot, then create a constant for it in img_config.php. One place to change it, for all images on your website.
#Filters and effects from PHP GD
There are a set of filters that are built in to PHP GD library. You can get an overview of these filters and their arguments by reviewing the documentation for imagefilter().
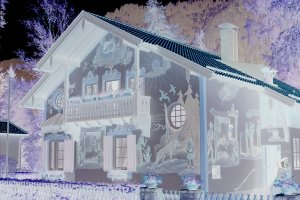
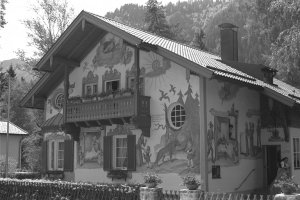
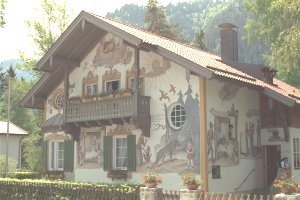
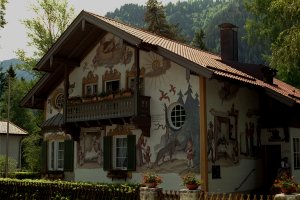
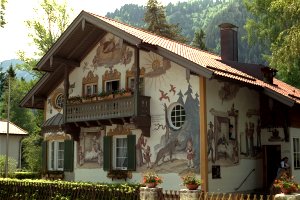
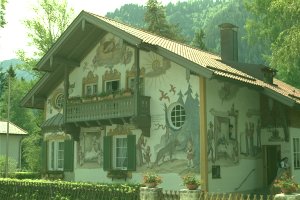
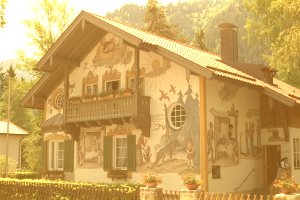
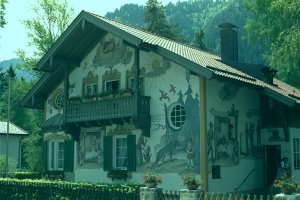
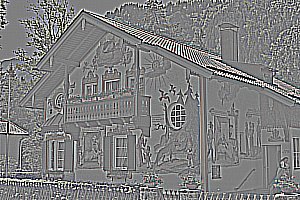
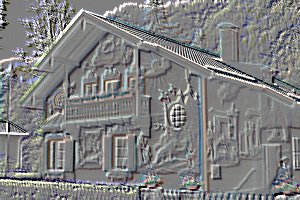
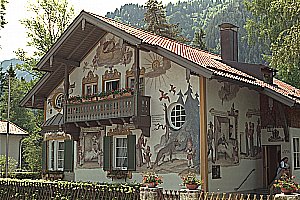
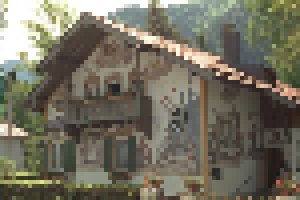
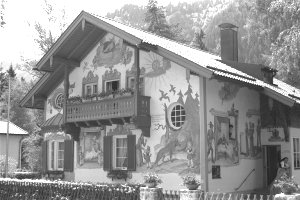
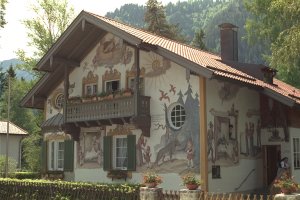
, from The Kodak Colorset.](https://dbwebb.se/cimage/imgd.php?src=cimage/kodim24.png&w=w2&save-as=jpg)
A house, kodimg24.png, from The Kodak Colorset.
Lets see some examples on using these filters. The base for all examples are:
?src=kodim24.png&w=300&save-as=jpg
#Filter Negate
This filter reverses all colors of the image.
| Usage | |
|---|---|
&f=negate |
 |
#Filter Grayscale
This filter converts the image into grayscale.
| Usage | |
|---|---|
&f=grayscale |
 |
#Filter Brightness
This filter changes the brightness of the image. Use arg1 to set the level of brightness. 0 is current setting, 255 is max light which means white and -255 is max dark meaning black.
| Usage | |
|---|---|
&f=brightness,50 |
 |
&f=brightness,-50 |
 |
#Filter Contrast
This filter changes the contrast of the image. Use arg1 to set the level of contrast. 0 is current setting, 100 is lowest contrast which means a completely gray image and -100 is max contrast.
| Usage | |
|---|---|
&f=contrast,20 |
 |
&f=contrast,-20 |
 |
#Filter Colorize
This is like the grayscale filter, except you can specify the color. Use arg1, arg2 and arg3 in the form of red, green, blue and arg4 for the alpha channel. The range for each color is 0 to 255 where a positive value enhances the color and a negative value decreases the color. For the alpha channel it is a value between 0 and 127. 0 indicates completely opaque while 127 indicates completely transparent.
| Usage | |
|---|---|
Enhance the green color &f=colorize,0,30,0,0 |
 |
Make it look golden with some brown tone &f=colorize,100,60,0,0 |
 |
Reduce the color red &f=colorize,-60,0,0,0 |
 |
#Filter Edge Detect
This filter uses edge detection to highlight the edges in the image.
| Usage | |
|---|---|
&f=edgedetect |
 |
#Filter Emboss
This filter embosses the image and gives it a 3D look.
| Usage | |
|---|---|
&f=emboss |
 |
#Filter Gaussian Blur
This filter blurs the image using the Gaussian method.
| Usage | |
|---|---|
&f=gaussian_blur |
 |
#Filter Selective Blur
This filter blurs the image.
| Usage | |
|---|---|
&f=selective_blur |
 |
#Filter Mean Removal
This filter uses mean removal to achieve a “sketchy” effect.
| Usage | |
|---|---|
&f=mean_removal |
 |
#Filter Smooth
This filter makes the image smoother. Use arg1 to set the level of smoothness. 0 gives a very smooth image
| Usage | |
|---|---|
Smooth &f=smooth,0 |
 |
Some smothness &f=smooth,10 |
 |
This filter applies a 9-cell convolution matrix where center pixel has the weight arg1 and others weight of 1.0. Using negative values can produce some effects.
| Usage | |
|---|---|
Make it unfocused &f=smooth,-5 |
 |
Show me the edges &f=smooth,-7 |
 |
Make it look sharper &f=smooth,-10 |
 |
#Filter Pixelate
This filter applies pixelation effect to the image, use arg1 to set the block size in pixels and arg2 to set the pixelation effect mode, whether to use advanced pixelation effect or not (defaults to FALSE).
| Usage | |
|---|---|
&f=pixelate,4,0 |
 |
&f=pixelate,4,1 |
 |
#Combine filters
You can combine up to eleven filters by naming them f, f0-f9.
| Usage | |
|---|---|
Make it grayscale and lighter.&f=grayscale&f0=brightness,40 |
 |
Make it grayscale, lighter and enhance contrast.&f=grayscale&f0=brightness,40&f1=contrast,-20 |
 |
Make it grayscale, lighter, enhance contrast & sharpen it.&f=grayscale&f0=brightness,40&f1=contrast,-20&sharpen |
 |
Make it sepia, a bit old.&f=grayscale&f0=brightness,-10&f1=contrast,-20&f2=colorize,120,60,0,0&sharpen |
 |
You can greatly enhance the perceived quality of the image by selecting a good combination of filters.
#Create shortcuts for long lists of options
Like the example above, creating a sepia effect using the options &f=grayscale&f0=brightness,-10&f1=contrast,-20&f2=colorize,120,60,0,0&sharpen can turn to be a bit large and hard to reuse. You have the ability to create shortcuts to longer expressions by defining them in img_config.php.
/**
 * Create custom shortcuts for more advanced expressions.
 */
'shortcut' => array(
    'sepia' => "&f=grayscale&f0=brightness,-10&f1=contrast,-20&f2=colorize,120,60,0,0&sharpen",
),
This gives you one place of changing your favorite combination of options. You the use it like this.
| Usage | |
|---|---|
Use ths shortcut for the sepia effect.&sc=sepia |
 |
#Rotate images
#Rotate based on EXIF
Some smartphones uses EXIF-information to let applications know how the image is rotated. This is in general handled by image processing tools. But if you, for example, take a image with your iPhone and email the image to yourself and then adds it to your website, then it will not adhere to the EXIF-information. Let us see how it works.
You will need the PHP EXIF module for this to work on your own system.
| Usage | |
|---|---|
Image taken with iPhone.&w=300 |
 |
Same image but autorotated.&w=300&aro |
 |
#Rotate based on angle
If you need to rotate the image, you do so by adding the angle to rotate. This is how you use the same source image as above, and rotate it “by hand” to make it look okey.
| Usage | |
|---|---|
Image from iPhoto, rotated.&w=300&r=-90 |
 |
#Rotate before or after processing?
Hmmm, in the example above, you got two different results on the image. Why? Well, aro, auto-rotate rotates the source image before its resized and r, rotate rotates the image after its resized.
The difference can be spelled out as.
- Before. Take the image, rotate it, then give it its final dimensions which makes some sense with respect to the width and height you are expecting.
- After. Take the image, resize it and then rotate the image. The target size you expect is there, but inverted - you get a portrait image and turn it to a landscape image and width and height are swapped.
| Rotate before or after resizing | |
|---|---|
Rotate before, final dimension as expected (same as auto-rotate).&w=100&h=200&rb=-90 |
Rotate after, expected dimensions are inverted, width becomes height and height becomes width.&w=100&h=200&ra=-90 |
 |
 |
#Rotate non perpendicular angle
If you rotate the image in a non perpendicular angle you need to fill the background with a color. You control what color to use with bgc, bg-color.
| Rotate and fill remaining space | |
|---|---|
Use auto rotation to get it right in the first place.&w=100&aro |
 |
Rotate 15 degrees, before processing. Resulting image keeps its dimensions,&w=100&aro&rb=15 |
 |
Rotate 15 degrees, after processing. Resulting image gets unknown dimensions.&w=100&aro&ra=15 |
 |
Rotate 15 degrees, after processing. Use bgc, bg-color to select the background color.&w=100&aro&ra=15&bgc=cccccc |
 |
Rotate 15 degrees, after processing. Combine with a, area to get only a part of the image and height together with crop-to-fit to make it all fit in a box of 100x100px.&w=100&aro&ra=15&a=20,30,40,20 |
 |
#Quality and file size
The file size for images should be small, as small can be. But file size is related to the quality of the image. Lesser file size means lesser quality. Too low quality means that the user gets to see low-quality images which leaves a bad impression of the website. But having the greatest images means large file size which means that the web page till increase its load time. So, one need to have a balance of good enough images and their file size. This is not always easy to achieve, but lets review some basics for quality and file size aspect, basics that will take you a long way.
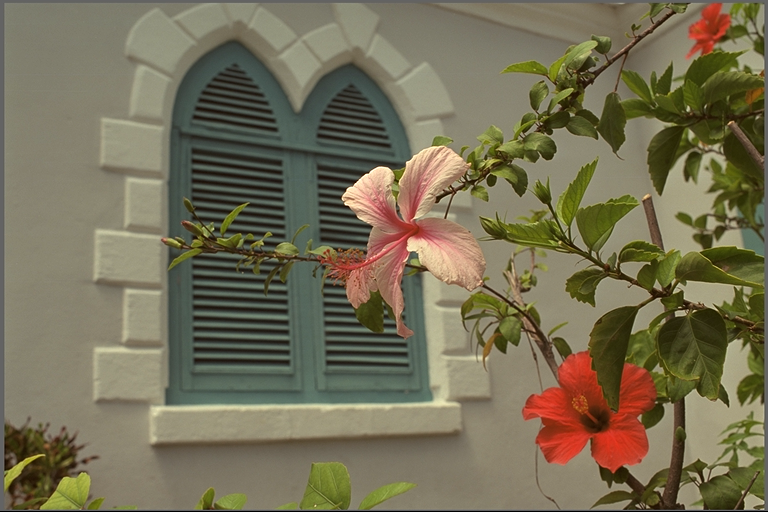
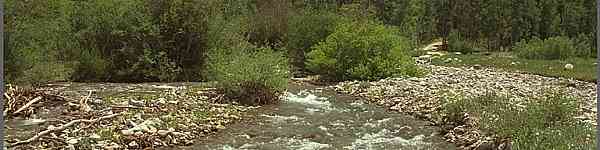
img.php?src=kodim07.png&w=630&save-as=jpg&sharpen&q=40
, from The Kodak Colorset. Good image and small filesize (26KB).](https://dbwebb.se/cimage/imgd.php?src=cimage/kodim07.png&w=w2&save-as=jpg&sharpen&q=40)
Flowers, kodimg07.png, from The Kodak Colorset. Good image and small filesize (26KB).
Lets take the flower-image above as an example, the original image is saved in PNG-format, 768 x 512 pixels and a file size (weight) of 557KB. Its a pretty heavy image. The above image is rescaled to a width of 630 pixels, saved in JPEG with a quality of 40. It is sharpened to reduce the fuzziness introduced in the resizing process. This all together reduces the file size to 26KB. That is a reduction to 5% of the original file size and a much more pleasant file size to download. Does it look good enough? Well, that will always depend on what you think, if its not good enough then increase the quality setting (and the file size) until you think its “good enough”.
Lets see, part by part, how the file size decreases for each step in the way.
| Action | File size | % |
|---|---|---|
?src=kodim07.png |
557KB | 100% |
?src=kodim07.png&w=630 |
358KB | 64% |
?src=kodim07.png&w=630&save-as=jpg |
29KB | 5% |
?src=kodim07.png&w=630&save-as=jpg&q=40 |
22KB | 4% |
?src=kodim07.png&w=630&save-as=jpg&q=40&sharpen |
26KB | 5% |
The largest decrease in file size, is when saving the image as JPEG. Changing the quality does not change the file size that much, the default quality is 60, so decreasing to 40 did some, but it also affects the visible quality of the image. Adding the sharpening filter increases the file size a small bit, but that action enhances the visible quality of the image and makes it sharper.
You can see why a web developer need to be able to manage the file size and image quality? Good web pages load fast and the file size of the images are an important factor.
#Image format basics
The different image formats JPEG 2, PNG 3 and GIF 4 have each its pros and cons. To understand image processing one need to know the basics on these file formats.
| File format | Characteristics | Guidelines |
|---|---|---|
| GIF | 8 bits per pixel, max 256 color. Supports animated images and transparency. | Use for logos or image with solid areas of colors. |
| JPEG | 16.7 million colors. Lossy compression meaning image looses information when saving it. | Use for photos and paintings or computer screen shots. |
| PNG | 8-bit, 24-bit and 32-bit per pixel including transparency, semi-transparency and lossless compression. | For computer generated graphics, drawings, images and screen shots. |
#Change image format
It is possible to change the target file format. Here are some examples when changing file format using kodim23.png as base. The original image is 768 x 512 pixels with 72 079 colors and a weight of 534KB.
| What | Colors | File size | The image |
|---|---|---|---|
Original as PNG 24-bit and resized. ?src=kodim23.png&w=300 |
43 272 | 89KB |  |
Save as JPEG. ?src=kodim23.png&w=300&save-as=jpg |
43 272 | 7KB | 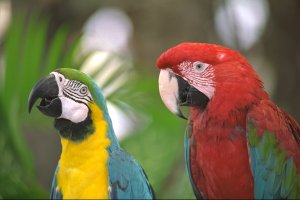 |
Save as GIF. ?src=kodim23.png&w=300&save-as=gif |
256 | 32KB |  |
Save as PNG 8-bit. ?src=kodim23.png&w=300&palette |
157 | 19KB |  |
The parameter save-as can be used to save the target image as jpg, png or gif. Using the parameter palette reduces the number of colors to max 256 colors. GIF and PNG 8-bit images can have max 256 colors.
#JPEG quality settings
The compression algorithm for JPEG has a quality setting which defines the level of compression to be done. The larger compression results in smaller file size. The quality shall be between 1 (low quality, small file size) to 100 (high quality, large file size).
Here is an example on how the quality settings affect the file size and the visible image.
Example based on ?src=kodim23.png&w=300&save-as=jpg.
| What | Quality | File size | File size with post processing | The image |
|---|---|---|---|---|
&q=100 |
100 | 47KB | 44KB |  |
&q=60 |
60 | 7478B | 7023B |  |
&q=30 |
30 | 5021B | 4453B |  |
&q=10 |
10 | 2875B | 2093B |  |
&q=1 |
1 | 1916B | 938B |  |
The default value for q is 60.
Post processing of the JPEG image, using an external tool such as JPEGTRAN 5 (used in above example), can further decrease the file size. This is something that can be configured by editing the file img_config.php.
Configure img_config.php to use post processing of JPEG images.
/**
 * Post processing of images using external tools, set to true or false
 * and set command to be executed.
 */
'postprocessing' => array(
    'jpeg_optimize'     => false,
    'jpeg_optimize_cmd' => '/usr/local/bin/jpegtran -copy none -optimize',
),
#PNG compression levels

A PNG-image looks the same, no matter what algorithm is used to compress it.
PNG has nine algorithms for compression, namely 1 to 9. The default is to let the PHP GD implementation to choose the algorithm. The levels are a mix of file size and time to compress / uncompress. The PNG format is lossless so the resulting image is always exactly the same.
In img.php we use the co, compress parameter to decide on which PNG compression algorithm shall be used. Here is how the file size is affected for the different values.
Example based on ?src=kodim23.png&w=300.
| What | Algorithm | File size | File size with post processing |
|---|---|---|---|
&co=1 |
1 | 118KB | 89KB |
&co=2 |
2 | 116KB | 89KB |
&co=3 |
3 | 113KB | 89KB |
&co=4 |
4 | 105KB | 89KB |
&co=5 |
5 | 105KB | 89KB |
&co=6 |
6 | 104KB | 89KB |
&co=7 |
7 | 103KB | 89KB |
&co=8 |
8 | 103KB | 89KB |
&co=9 |
9 | 103KB | 89KB |
It differs 13% in file size depending on which algorithm is used.
But, using an external tool for post processing the PNG image file results in a much smaller image size, independent on which algorithm is used. In this example we used OptiPNG 6 and PNGOUT 7 for post processing. You edit the file img_config.php to enable or disable post processing and setting which program should handle it. Post processing for PNG images is a two-stage process named filter and deflate.
Configure img_config.php to use post processing of PNG images.
/**
 * Post processing of images using external tools, set to true or false
 * and set command to be executed.
 */
'postprocessing' => array(
    'png_filter'        => false,
    'png_filter_cmd'    => '/usr/local/bin/optipng -q',

    'png_deflate'       => false,
    'png_deflate_cmd'   => '/usr/local/bin/pngout -q',
),
#Debugging image processing
You can visualize what happens during image processing by adding the v, verbose parameter. It will then display the resulting image together with a verbose output on what is actually happening behind the scene.
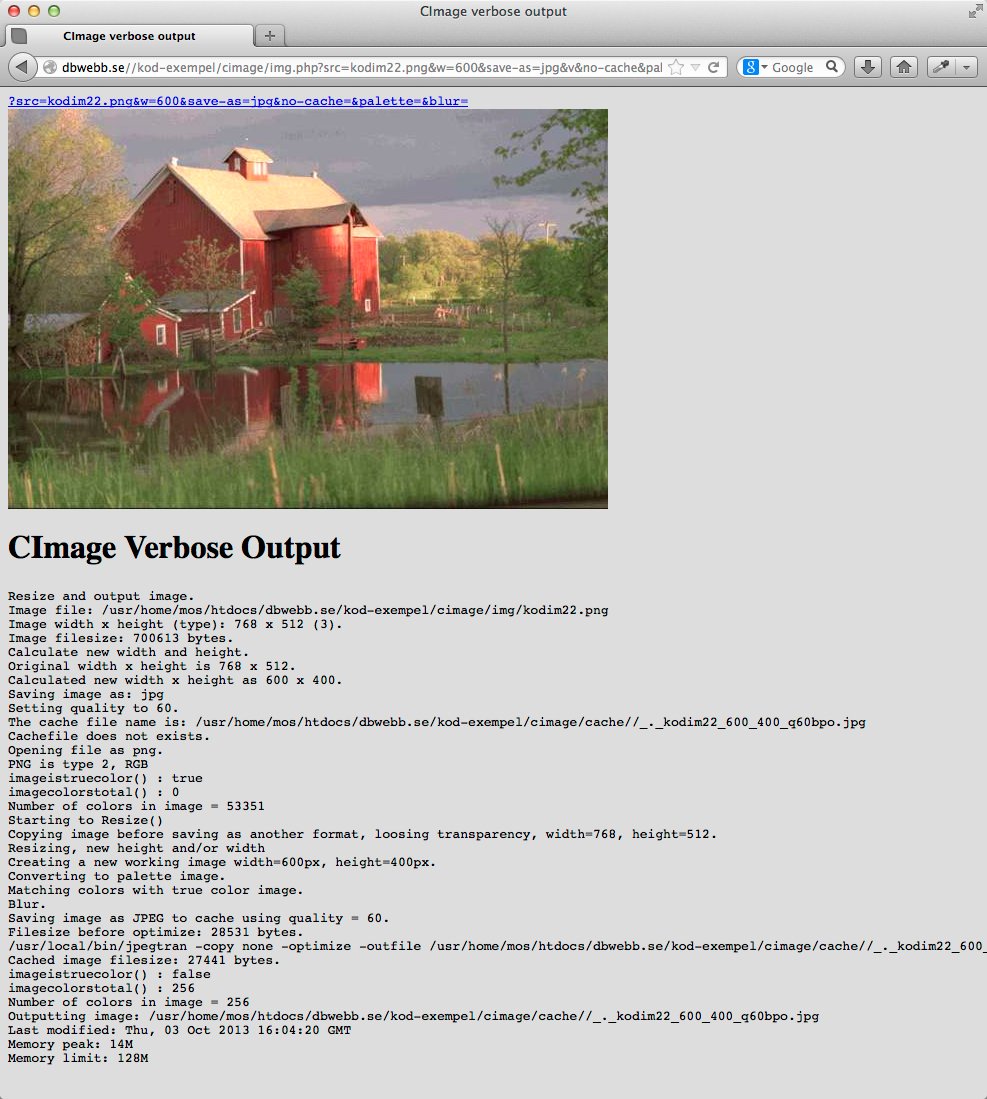
This can be most useful for debugging and to understand what actually happen.
The parameter nc, no-cache ignores the cached item and will always create a new cached item.
The parameter so, skip-original skips the original image, even it that is a best fit. As a result a cached image is created and displayed.
#A JSON representation of the image
You can ge a JSON representation of the image by adding the option json. This can be useful if you need to know the actual dimension of the image.
For example, the following image is created like this:
&w=300&save-as=jpg

Its JSON-representation is retrieved like this:
&w=300&save-as=jpg&json
Which gives the following result.
{
    "src":"kodim24.png",
    "srcGmdate":"Wed, 12 Feb 2014 13:46:19",
    "cache":"_._kodim24_300_200_q60.jpg",
    "cacheGmdate":"Sat, 06 Dec 2014 14:09:50",
    "filename":"_._kodim24_300_200_q60.jpg",
    "width":300,
    "height":200,
    "aspectRatio":1.5,
    "size":11008,
    "colors":25751
}
I’ll use this feature for ease testing of img.php and CImage. But the feature can also be useful when one really want complete control over the resulting dimension of an image.
#Implications and considerations
Here are some thoughts when applying img.php on a live system.
#Select the proper mode
Select the proper mode for img.php. Set it to “strict” or “production” to prevent outsiders to get information about your system. Use only “development” for internal use since its quite verbose in its nature of error reporting.
#Put the installation directory outside web root
Edit the config file to put the installation directory – and the cache directory – outside of the web root. Best practice would be to store the installation directory and cache, outside of the web root. The only thing needed in the web root is img.php and img_config.php (if used) which can be placed, for example, in /cimage/imgd.php or just as /img.php.
#Friendly urls through .htaccess
Use .htaccessand rewrite rules (Apache) to get friendly image urls. Put img.php in the /img directory. Put the file .htaccess in the web root.
.htaccess for img.php.
#
# Rewrite to have friendly urls to img.php, edit it to suite your environment.
#
# The example is set up as following.
#
#  img                 A directory where all images are stored
#  img/me.jpg          Access a image as usually.
#  img/img.php         This is where I choose to place img.php (and img_config.php).
#  image/me.jpg        Access a image though img.php using htaccess rewrite.
#  image/me.jpg?w=300  Using options to img.php.
#
# Subdirectories also work.
#  img/me/me.jpg          Direct access to the image.
#  image/me/me.jpg        Accessed through img.php.
#  image/me/me.jpg?w=300  Using options to img.php.
#
RewriteRule ^image/(.*)$        img/img.php?src=$1 [QSA,NC,L]
You can now access all images through either /image/car.jpg (which uses img.php) or as usual through /img/car.jpg without passing through img.php. You send the arguments as usual.
/image/car.jpg?w=300&sharpen
Or a image that resides in a subdirectory.
/image/all-cars/car.jpg?w=300&sharpen
The result is good readable urls to your images. Its easy for the search engine to track and you can use the directory structure already existing in /img. Just like one wants to have it.
#Monitor cache size
There is a utility cache.bash included for monitoring the size of the cache-directory. It generates an output like this.
$ ./cache.bash
Usage: ./cache.bash [cache-dir]

$ ./cache.bash cache
Total size:       27M
Number of files:  225

Top-5 largest files:
1032    cache/_._kodim08_768_512_q60convolvesharpen.png
960     cache/_._kodim08_768_512_q60convolveemboss.png
932     cache/_._kodim08_768_512_q60_rb45.png
932     cache/_._kodim08_768_512_q60_ra45.png
856     cache/_._kodim08_768_512_q60_rb90.png

Last-5 created files:
2014-11-26 16:51 cache/_._kodim08_768_512_q60convolvelighten.png
2014-11-26 16:51 cache/_._kodim08_768_512_q60convolveblur.png
2014-11-26 16:48 cache/_._kodim08_400_267_q60convolvesharpen.png
2014-11-26 16:48 cache/_._kodim08_400_267_q60convolvelighten.png
2014-11-26 16:48 cache/_._kodim08_400_267_q60convolveemboss.png

Last-5 accessed files:
2014-11-27 16:12 _._wider_900_581_q60.jpg
2014-11-27 16:12 _._wider_750_484_q60.jpg
2014-11-27 16:12 _._wider_640_413_q60.jpg
2014-11-27 16:12 _._wider_640_200_c640-200-0-100_q60.jpg
2014-11-27 16:12 _._wider_600_387_q60.jpg
Use it as a base if you feel the need to monitor the size och the cache-directory.
#Read-only cache
The cache directory need to be writable for img.php to create new files. But its possible to first create all cache-files and then set the directory to be read-only. This will give you a way of shutting of img.php from creating new cache files. img.php will then continue to work for all images having a cached version but will fail if someone tries to create a new, not previously cached, version of the image.
#Post-processing with external tools
You can use external tools to post-process the images to optimize the file size. This option is available for JPEG and for PNG images. Post-processing is disabled by default, edit img_config.php to enable it.
It takes additional time to do post processing, it can take up to a couple of seconds. This is processing to create the cached image, thereafter the cached version will be used and no more post processing needs to be done.
These tools for post processing is not a part of CImage and img.php, you need to download and install them separately. I use them myself on my system to get an optimal file size.
#Allowing remote download of images
You can allow img.php to download remote images. That can be enabled in the config-file. However, before doing so, consider the implications on allowing anyone to download a file, hopefully an image, to your server and then the possibility to access it through the webserver.
That sounds scary. It should.
For my own sake I will use it like this, since I consider it a most useful feature.
- Create a special version of
img.phpthat has remote download allowed, hide it from public usage. - Always use a password.
- Download and process the image and save it as an
alias. - Integrate the image into your webpage and use the image in the alias directory.
This is an easy way to quickly download a remote image, process and share it.
So, its a scary feature and I might regret I did put it in. Still, its disabled by default and you enable it on your own risk. I have tried to make it as secure as I can, but I might have missed something. I will run it on my own system so I guess I’ll find out how secure it is.
#Community
There is a Swedish forum where you can ask questions, even in English. The forum is a general forum for education in web development, it is not specific for this software.
Ask questions on CImage and img.php in the PHP sub forum.
Or ask it on GitHub by creating an issue – that would be the best place to ask questions.
Or if you fancy irc.
irc://irc.bsnet.se/#db-o-webbirc://irc.freenode.net/#dbwebb
#Trouble- and feature requests
Use GitHub to report issues. Always include the following.
- Describe very shortly: What are you trying to achieve, what happens, what did you expect.
- Parameter list used for
img.php. - The image used.
If you request a feature, describe its usage and argument for why you think it fits into CImage and img.php.
Feel free to fork, clone and create pull requests.
#Appendix A. The config file img_config.php
img.php loads a config file named img_config.php which contains essential input. You can change that config file to customize and adapt behavior to your own environment.
All values in the config-file has default settings, so you can manage without a config-file.
Sample of img_config.php.
/**
 * Configuration for img.php, name the config file the same as your img.php and
 * append _config. If you are testing out some in imgtest.php then label that
 * config-file imgtest_config.php.
 *
 */
return array(

    /**
     * Set mode as 'strict', 'production' or 'development'.
     *
     * Default values:
     *  mode: 'production'
     */
    'mode' => 'development',
    //'mode' => 'production', // 'development', 'strict'


    /**
     * Where are the sources for the classfiles.
     *
     * Default values:
     *  autoloader:  null     // used from v0.6.2
     *  cimage_class: null    // used until v0.6.1
     */
    'autoloader'   =>  __DIR__ . '/../autoload.php',
    //'cimage_class' =>  __DIR__ . '/../CImage.php',


    /**
     * Paths, where are the images stored and where is the cache.
     * End all paths with a slash.
     *
     * Default values:
     *  image_path: __DIR__ . '/img/'
     *  cache_path: __DIR__ . '/../cache/'
     *  alias_path: null
     */
    'image_path'   =>  __DIR__ . '/img/',
    'cache_path'   =>  __DIR__ . '/../cache/',
    //'alias_path'   =>  __DIR__ . '/img/alias/',


    /**
    * Use password to protect from missusage, send &pwd=... or &password=..
    * with the request to match the password or set to false to disable.
    * Passwords are only used together with the options for remote download
    * and aliasing.
    *
    * Default values.
    *  password: false // as in do not use password
    */
    //'password' => false, // "secret-password",


    /**
     * Allow or disallow downloading of remote files, images available on
     * some remote server. Default is to disallow.
     *
     * Default values.
     *  remote_allow:    false
     *  remote_pattern:  null  // use default values from CImage
     */
    //'remote_allow'    => true,
    //'remote_pattern'  => '#^https?://#',


    /**
     * A regexp for validating characters in the image or alias filename.
     *
     * Default value:
     *  valid_filename:  '#^[a-z0-9A-Z-/_\.:]+$#'
     *  valid_aliasname: '#^[a-z0-9A-Z-_]+$#'
     */
     //'valid_filename'  => '#^[a-z0-9A-Z-/_\.:]+$#',
     //'valid_aliasname' => '#^[a-z0-9A-Z-_]+$#',


     /**
     * Check that the imagefile is a file below 'image_path' using realpath().
     * Security constraint to avoid reaching images outside image_path.
     * This means that symbolic links to images outside the image_path will fail.
     *
     * Default value:
     *  image_path_constraint: true
     */
     //'image_path_constraint' => false,


     /**
     * Set default timezone.
     *
     * Default values.
     *  default_timezone: ini_get('default_timezone') or 'UTC'
     */
    //'default_timezone' => 'UTC',


    /**
     * Max image dimensions, larger dimensions results in 404.
     * This is basically a security constraint to avoid using resources on creating
     * large (unwanted) images.
     *
     * Default values.
     *  max_width:  2000
     *  max_height: 2000
     */
    //'max_width'     => 2000,
    //'max_height'    => 2000,


    /**
     * Set default background color for all images. Override it using
     * option bgColor.
     * Colorvalue is 6 digit hex string between 000000-FFFFFF
     * or 8 digit hex string if using the alpha channel where
     * the alpha value is between 00 (opaqe) and 7F (transparent),
     * that is between 00000000-FFFFFF7F.
     *
     * Default values.
     *  background_color: As specified by CImage
     */
    //'background_color' => "FFFFFF",
    //'background_color' => "FFFFFF7F",


    /**
     * Post processing of images using external tools, set to true or false
     * and set command to be executed.
     *
     * Default values.
     *
     *  png_filter:        false
     *  png_filter_cmd:    '/usr/local/bin/optipng -q'
     *
     *  png_deflate:       false
     *  png_deflate_cmd:   '/usr/local/bin/pngout -q'
     *
     *  jpeg_optimize:     false
     *  jpeg_optimize_cmd: '/usr/local/bin/jpegtran -copy none -optimize'
     */
    /*
    'postprocessing' => array(
        'png_filter'        => false,
        'png_filter_cmd'    => '/usr/local/bin/optipng -q',

        'png_deflate'       => false,
        'png_deflate_cmd'   => '/usr/local/bin/pngout -q',

        'jpeg_optimize'     => false,
        'jpeg_optimize_cmd' => '/usr/local/bin/jpegtran -copy none -optimize',
    ),
    */


    /**
     * Create custom convolution expressions, matrix 3x3, divisor and
     * offset.
     *
     * Default values.
     *  convolution_constant: array()
     */
    /*
    'convolution_constant' => array(
        //'sharpen'       => '-1,-1,-1, -1,16,-1, -1,-1,-1, 8, 0',
        //'sharpen-alt'   => '0,-1,0, -1,5,-1, 0,-1,0, 1, 0',
    ),
    */


    /**
     * Prevent leeching of images by controlling who can access them from where.
     * Default it to allow hotlinking.
     * Password apply when hotlinking is disallowed, use password to allow.
     * The whitelist is an array of regexpes for allowed hostnames that can
     * hotlink images.
     *
     * Default values.
     *  allow_hotlinking:     true
     *  hotlinking_whitelist: array()
     */
     /*
    'allow_hotlinking' => false,
    'hotlinking_whitelist' => array(
        '#^localhost$#',
        '#^dbwebb\.se$#',
    ),
    */


    /**
     * Create custom shortcuts for more advanced expressions.
     *
     * Default values.
     *  shortcut: array(
     *      'sepia' => "&f=grayscale&f0=brightness,-10&f1=contrast,-20&f2=colorize,120,60,0,0&sharpen",
     *  )
     */
     /*
    'shortcut' => array(
        'sepia' => "&f=grayscale&f0=brightness,-10&f1=contrast,-20&f2=colorize,120,60,0,0&sharpen",
    ),*/


    /**
     * Predefined size constants.
     *
     * These can be used together with &width or &height to create a constant value
     * for a width or height where can be changed in one place.
     * Useful when your site changes its layout or if you have a grid to fit images into.
     *
     * Example:
     *  &width=w1  // results in width=613
     *  &width=c2  // results in spanning two columns with a gutter, 30*2+10=70
     *  &width=c24 // results in spanning whole grid 24*30+((24-1)*10)=950
     *
     * Default values.
     *  size_constant: As specified by the function below.
     */
    /*
    'size_constant' => function () {

        // Set sizes to map constant to value, easier to use with width or height
        $sizes = array(
          'w1' => 613,
          'w2' => 630,
        );

        // Add grid column width, useful for use as predefined size for width (or height).
        $gridColumnWidth = 30;
        $gridGutterWidth = 10;
        $gridColumns     = 24;

        for ($i = 1; $i <= $gridColumns; $i++) {
            $sizes['c' . $i] = ($gridColumnWidth + $gridGutterWidth) * $i - $gridGutterWidth;
        }

        return $sizes;
    },*/


    /**
     * Predefined aspect ratios.
     *
     * Default values.
     *  aspect_ratio_constant: As the function below.ac
     */
    /*'aspect_ratio_constant' => function () {
        return array(
            '3:1'   => 3/1,
            '3:2'   => 3/2,
            '4:3'   => 4/3,
            '8:5'   => 8/5,
            '16:10' => 16/10,
            '16:9'  => 16/9,
            'golden' => 1.618,
        );
    },*/
);
You can create a copy of img.php and name if img2.php and that script will then look for a config-file named img2_config.php. This can be useful when you develop and want both a production-script (no error messages) and a development-script (verbose error messages).
#Appendix B. Using CImage public API
The script img.php uses the class CImage which carries out all the image processing, caching and delivery of the resulting image. img.php takes the incoming query string and prepares all the parameters and then uses the public API of CImage.
How img.php uses CImage.
/**
 * Create the class for the image.
 */
require $config['cimage_class'];

$img = new CImage();
$img->setVerbose($verbose);

/**
 * Load, process and output the image
 */
$img->log("Incoming arguments: " . print_r(verbose(), 1))
    ->setSaveFolder($cachePath)
    ->useCache($useCache)
    ->setSource($srcImage, $imagePath)
    ->setOptions(
        array(
            // Options for calculate dimensions
            'newWidth'  => $newWidth,
            'newHeight' => $newHeight,
            'aspectRatio' => $aspectRatio,
            'keepRatio' => $keepRatio,
            'cropToFit' => $cropToFit,
            'fillToFit' => $fillToFit,
            'crop'      => $crop,
            'area'      => $area,
            'upscale'   => $upscale,

            // Pre-processing, before resizing is done
            'scale'        => $scale,
            'rotateBefore' => $rotateBefore,
            'autoRotate'   => $autoRotate,

            // General processing options
            'bgColor'    => $bgColor,

            // Post-processing, after resizing is done
            'palette'   => $palette,
            'filters'   => $filters,
            'sharpen'   => $sharpen,
            'emboss'    => $emboss,
            'blur'      => $blur,
            'convolve'  => $convolve,
            'rotateAfter' => $rotateAfter,

            // Output format
            'outputFormat' => $outputFormat,
            'dpr'          => $dpr,
        )
    )
    ->loadImageDetails()
    ->initDimensions()
    ->calculateNewWidthAndHeight()
    ->setSaveAsExtension($saveAs)
    ->setJpegQuality($quality)
    ->setPngCompression($compress)
    ->useOriginalIfPossible($useOriginal)
    ->generateFilename($cachePath)
    ->useCacheIfPossible($useCache)
    ->load()
    ->preResize()
    ->resize()
    ->postResize()
    ->setPostProcessingOptions($postProcessing)
    ->save()
    ->linkToCacheFile($aliasTarget)
    ->output();
img.php may also use CImage to set the default background color and add convolution expressions, but it depends on if the values are set in the config file img_config.php. It can look like this:
$img->setDefaultBackgroundColor($config['background_color']);
$img->addConvolveExpressions($config['convolution_constant']);
#Revision
2016-06-27 (F, mos) Replaced by cimage.se/doc.
2015-07-25 (E, mos) Minor edits for release 0.7.1.
2015-02-10 (G, mos) Release 0.7.
2015-01-08 (F, mos) Release 0.6.1.
2014-12-06 (E, mos) Release 0.6.
2014-04-01 (D, mos) Release 0.5.2.
2014-02-12 (C, mos) Release 0.5 & 0.5.1 and re-read and structured document.
2014-01-27 (B, mos) Maintenance release 0.4.1.
2013-10-08 (A, mos) First release as part of course material for oophp.
