

CForm - A collection of PHP classes to ease working with HTML forms
The CForm is a collection of PHP classes that aid in working with HTML forms. The form can be created using object or array syntax, rendered, posted, validated and managed in a callback. All this is programmatically centered around the usage of CForm.
This is basically an easy way – for the PHP programmer – to work with HTML forms.
#License
The CForm is free software and open source software, licensed according MIT.
#Requirements
CForm requires PHP 5.4.
#Installation
The current version is a development branch v2 and tagged as v1.9.0 at 2014-04-17.
#Clone it from GitHub
The sourcode is available on GitHub. Clone, fork or download as zip.
I prefer cloning like this.
git clone https://github.com/mosbth/cform.git -b v2
Note that the latest version resides in the branch named v2 so be sure to use the correct branch with the switch -b v2.
#Install using composer
The package is available at Packagist as mos/cform.
You can install the package using composer. Add the following to your composer.json.
composer.json
{
    "require": {
        "mos/cform": "2.*@dev"
    }
}
You can now install CForm using the following command.
composer validate
composer install --no-dev
The package is now available in you vendor map.
#Verify installation
Point your web browser to the installation directory and webroot/test and choose one of the testfiles to open. It could look something like this.
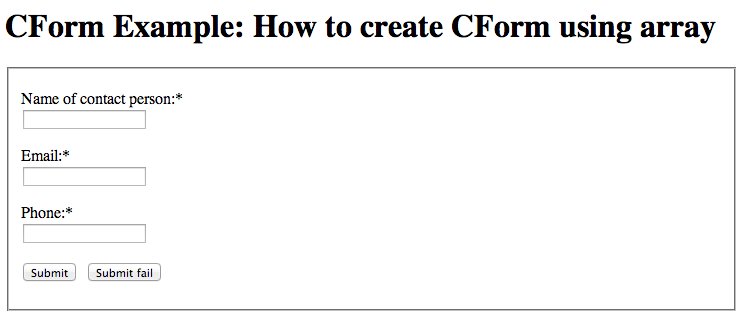
Example form from test-as-array.php, displaying a simple form.
Try out using the form, fill it in with valid entries and try invalid entries. Test it to get an understanding of how the form, and CForm, works.
#Basic usage
#Workflow with forms
Working with CForm requires basic understanding on how HTML forms are created, posted and handled. The steps can be stated as follows.
- Define the form and its elements, using array syntax or object syntax.
- Render the form on a web page.
- Post the form and check if a form is posted.
- Provide a callback handler to a posted form.
- When the handler is done, redirect to a page displaying the response.
These are basic steps in any form handling page. Lets look at the steps to create our own example, just like the test-page webroot/test/test-as-array.php.
#Create an instance of the CForm class
The first thing we must do is to create an instance of the class CForm.
$form = new \Mos\HTMLForm\CForm();
#Create form elements using array syntax
Next is to create elements in the form. This is how form elements are created using the CForm array syntax.
$form = $form->create([], [
    'name' => [
      'type'        => 'text',
      'label'       => 'Name of contact person:',
      'required'    => true,
      'validation'  => ['not_empty'],
    ],
    'email' => [
      'type'        => 'text',
      'required'    => true,
      'validation'  => ['not_empty', 'email_adress'],
    ],
    'phone' => [
      'type'        => 'text',
      'required'    => true,
      'validation'  => ['not_empty', 'numeric'],
    ],
    'submit' => [
        'type'      => 'submit',
        'callback'  => function($form) {
            $form->AddOutput("<p><i>DoSubmit(): Form was submitted. Do stuff (save to database) and return true (success) or false (failed processing form)</i></p>");
            $form->AddOutput("<p><b>Name: " . $form->Value('name') . "</b></p>");
            $form->AddOutput("<p><b>Email: " . $form->Value('email') . "</b></p>");
            $form->AddOutput("<p><b>Phone: " . $form->Value('phone') . "</b></p>");
            $form->saveInSession = true;
            return true;
        }
    ],
    'submit-fail' => [
        'type'      => 'submit',
        'callback'  => function($form) {
            $form->AddOutput("<p><i>DoSubmitFail(): Form was submitted but I failed to process/save/validate it</i></p>");
            return false;
        }
    ],
]);
What happens is that three form elements are created together with two submit buttons. You might see that the array keys, for each element, maps to its resulting HTML attribute or its intended behavior.
Each button has an own callback. The callbacks in the example shows off what happens in a successful and in an unsuccessful callback handler.
The structure for the form is now created.
#Render the form as HTML
The form can now be rendered, or printed, as HTML like this.
echo $form->getHTML();
You can see the rendered HTML code and compare it to its array construct to get a better picture on how CForm translates the array constructs into HTML.
It looks something like this.
<form method='post'>
<fieldset>
<p>
<label for='form-element-name'>Name of contact person:<span class='form-element-required'>*</span></label><br/>
<input id='form-element-name' type='text' name='name' required='required'/></p><p class='cf-desc'></p>
<p>
<label for='form-element-email'>Email:<span class='form-element-required'>*</span></label><br/>
<input id='form-element-email' type='text' name='email' required='required'/></p><p class='cf-desc'>
</p>
<p>
<label for='form-element-phone'>Phone:<span class='form-element-required'>*</span></label><br/>
<input id='form-element-phone' type='text' name='phone' required='required'/></p><p class='cf-desc'>
</p>
<p class='buttonbar'>
<span><input id='form-element-submit' type='submit' name='submit' value='Submit' /></span>
<span><input id='form-element-submit-fail' type='submit' name='submit-fail' value='Submit fail' /></span>
</p>
</fieldset>
</form>
#Use the session to remember the posted values
We are now close to start using the form in action. The form uses the session to remember the posted values when the form does not validate or when the callback returns false. So, the session must be started.
There is also a utility method that sets the form to remember the posted values no matter what. That can be handy when testing a form. It saves time from filling in the form again and again.
Start the session as usual.
session_name('cform_example'); // Any session name works
session_start();
Instruct CForm to always remember the posted values.
$form->saveInSession = true;
#Check if the form is submitted
CForm uses, as default, a self-submitting form tactic. It submits itself to the same page (or route).
So, in the same function that creates the form, before its rendered, we need to check if the form was submitted. This is how its done.
Check if form was submitted and take appropriate action.
// Check the status of the form
$status = $form->check();

if ($status === true) {

    // What to do if the form was submitted?
    $form->AddOUtput("<p><i>Form was submitted and the callback method returned true.</i></p>");
    header("Location: " . $_SERVER['PHP_SELF']);

} else if ($status === false) {

    // What to do when form could not be processed?
    $form->AddOutput("<p><i>Form was submitted and the Check() method returned false.</i></p>");
    header("Location: " . $_SERVER['PHP_SELF']);
}
The method $form->check() is a central part of CForm. It checks if the form was submitted and validates the values and decides if the validation was correct. It also calls the callback for the button which submitted the form.
If validation fails, $form->check() returns false.
Otherwise the callback is called and $form->check() returns its return value, usually true or false, indicating the success of the callback.
Now we can test if the form was successfully processed or not, using the if and else if. There we take a decision on where to go from here. A response page would be appropriate if the form submission was successful. If something went wrong it would perhaps be a good idea to redirect the user back to the original form to correct the errors.
If the form was not posted, then $form->check() returns null and the form can be rendered.
And the form cycle is complete.
#A sample installation
You can see the sample installation here, and try out the example programs.
#Trouble and feature requests
Use GitHub to report issues. Always include the following.
- Describe very shortly: What are you trying to achieve, what happens, what did you expect.
- Make a test case with a minimal structure of the form and explain how to reproduce the behavior.
If you request a feature, describe its usage and argument for why it fits into CForm.
Feel free to fork, clone and create pull requests.
#Earlier releases of CForm
There is an earlier release of the class CForm which is described in this swedish article, “CForm, en PHP-klass för att skapa, presentera och validera HTML-formulär”.
This version is tagged as v0.9 on GitHub and all classes are combined into one file CForm.php. This version works for PHP 5.3 and up.
You can use this version by cloning and checking out the correct tag.
git clone https://github.com/mosbth/cform.git
cd cform
git checkout v0.9.0
#Revision
2014-04-17 (A, mos) First release on dbwebb/opensource as part of course material for phpmvc-course.
